Thursday, March 31, 2011

Ruffle Smocking


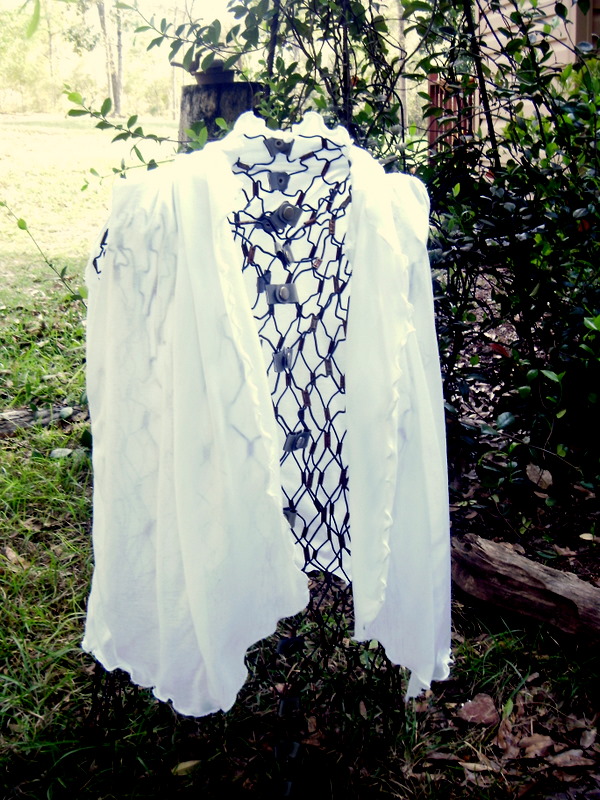
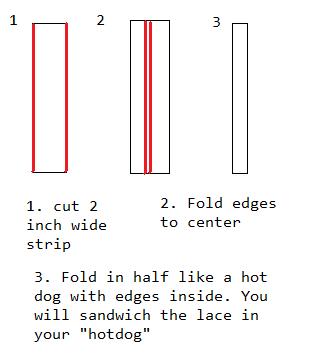
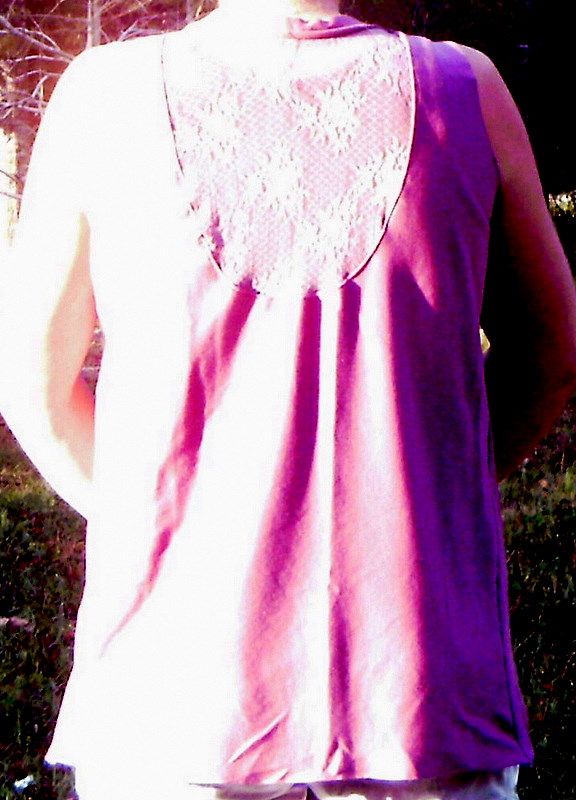
      Sometimes, on occasion, you just know you are loving what you are sewing before it is even finished. This was one of those rare times. Smocked clothing is a the top of my list of favorites. I like how it looks, I like how it fits, and I like how easy it is to sew. I also like ruffles, texture, and points of interest on garments. This little idea combines all my favorites into one stretchy, ruffly piece of goodness.
     Here's the basics of ruffle smocking. Have a shirt first off, I made a basic tank that was plenty roomy for the baby bump. Next cut lots of inch wide strips.


     Lay one strip at a time on your shirt and smock over it.
(Machine smocking is very easy. Hand wind your bobbin with elastic thread and sew straight, evenly spaced lines with the elastic on the inside of your garment. Spritz with water and pat with a hot iron when finished)


     Over lap your strips just slightly. When I finished one strip, I just laid another right down and kept sewing. I think I did about 6 rows, because I wanted a nice conspicuous band around the bottom. You can wet it and pat with an iron, or be lazy like me. Douse it in the sink and throw it in the dryer while you go read a bedtime story to the munchkin. Either which way it scrunches up just lovely.
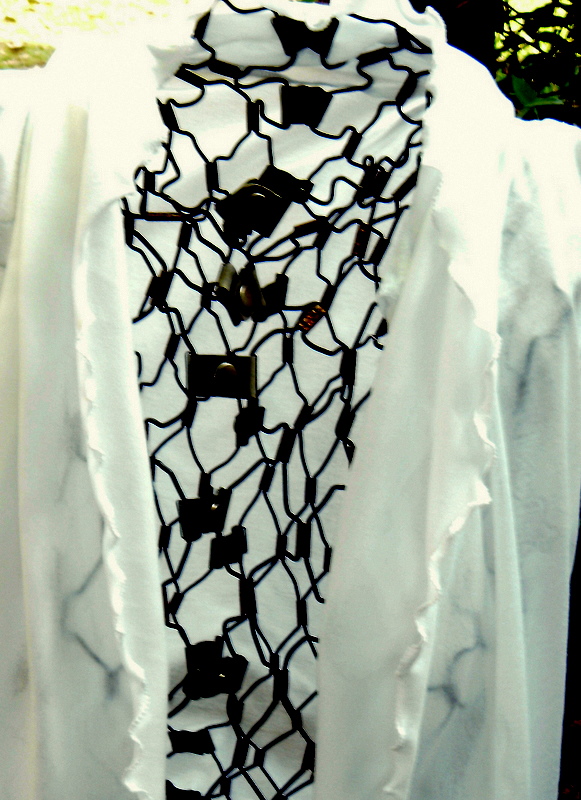
     I added a very narrow ruffle around the neck to tie it all together.


     A lot of impact for very little effort...my kind of project!


Linking to:

God's Fingerprints Are Everywhere

     I don't have to search very hard to find them...a few steps beyond my front door and they are there in a thousand ways. Let's take a walk.
     I can see them...

    
     in the clear blue sky...


     In the peace that He gives...


     in color...


     in the food He provides...


     in new growth...


     in the care He takes that even an ugly weed should be given pretty flowers.
It isn't a matter of if God is present in my world, I can see Him if I just take the time to look.

"Many, O Lord my God, are thy wonderful works which thou hast done, and thy thoughts which are to usward: they cannot be reckoned up in order unto thee: if I would declare and speak of them, they are more than can be numbered." Psalm 40:5

Tuesday, March 29, 2011

Reversible Wipeable Bibs

    
     This little project was not very high on my list of "todo's", until today. I decided I had had quite enough of a wet messy baby at the end of every meal. I wanted a bib that stayed on with a SNAP, not cheap Velcro that didn't stick. I wanted a pocket to catch the dribbling cereal, and I wanted it to be wipeable.  The other day I saw some bibs a lady had made out of plastic table cloths. I didn't save it so I can't link you to it, but that part wasn't my idea. It reminded me I had bought several at the end of the summer last year when they were on sale. I like to make baby changing mats out of them for shower presents so I had stocked up on them. The ones I used are those flannel backed vinyl ones. You can find them at Big Lots, the Dollar Store, Walmart, any place like that.
     The first thing I did was make a pattern based on a bib I already had. (The one with cheap Velcro that falls off every time you look at!) I traced it on parchment paper first, because I wanted to alter the size a little.


     Once I got the shape I wanted, I traced the bottom section to make a pocket pattern.


     I cut out the pocket part with the straight part on a fold. I wanted the pocket to have the wipeable part on the inside and the outside so that is why it needs to be on the fold.


     Next, I sewed the pocket to the layer I wanted it on. I did not do a pocket on both sides, but you certainly could.


     I sewed this piece onto a second layer right sides together. You have to leave a hole at the bottom for your hand to get in and turn it right side out.


     I used a different print for the backsides just for fun.


     Once turned right side out, I sewed the hole close and topstiched around the entire thing. I felt it looked neater and made the edges sturdier to do this.


     I added snaps to the straps, but you could also sew on some Velcro. I personally despise Velcro, and would much rather use anything besides that. I won't hold it against you if you like it though. =)


     All done! I can't imagine these will last for forever, but since they cost me a about 20 cents a piece, I'm not especially worried about it. And besides, they are way cuter then any I've seen.


     It would be cute to go around the edges with some bright colored bias tape. This was a "use what you have, and get it done quick while the kiddo is sleeping" deal today. Maybe I'll try the bias tape next time.

Linking to:
Tea Rose Home
Sew Much Ado
Someday Crafts
Be Different Act Normal

Monday, March 28, 2011

Circle skirt dress - the sequel

     Those little dresses I made yesterday kept niggling at my mind. I wanted to know if the same concept would work for an adult size...and the bigger question, would it work for a maternity dress? If you haven't noticed, I'm bent on making clothes that will work with the current baby belly and still be wearable when baby has made his/her grand appearance. It just seems a waste to me to only wear clothes for five or so months and then box them up. I had a few extra minutes during the little lady's nap time so I tried it....and it works! Yippee!


     I had a shirt I had made that shrunk horribly in the wash. Don't even ask me how many things I have ruined from lack of prewashing fabric...its rather abominable. It was about 4 inches too short and the sleeves were too tight so I used that as my starter shirt. I cut the sleeves off and the bottom of the shirt. I had a picture of this, but my camera ate it....or I didn't save it right, whatever. Anyway, I'm sure you can figure that part out. Next I attached the skirt. Again, if you need help with a circle skirt, Made has just about the best tutorial I've seen on one. For my dress I did NOT do a full circle skirt, I did a half circle skirt. I wanted it to be flowy and have extra fabric for a belly, but not be large enough to house the offspring of an elephant!
     To do a half circle skirt just do everything in 2's rather than 4's. For instance, fold your fabric in half rather than in fourths, divide your waist measurement in half rather than in fourths, etc.
     Once finished with that, I just hemmed the arm holes, added some ruffly design up top and tied a sash around the waist.


     I think it'll be great for the rest of the summer and post baby bump as well. Me thinks I need about 7 more...the sad thing is, it won't be hard to find that many shrunken shirts to use.


     Happy sewing! =)

Linking to:
Tea Rose Home
Sew Much Ado
Someday Crafts
Be Different Act Normal

Sunday, March 27, 2011

Circle skirt dresses


     I do believe I might have just found a dress easier to make than a pillowcase dress! The other day while meandering through Walmart, I saw they had some long sleeve children's shirts on sale for a dollar each. I picked up a pink one and a green one, thinking I could alter them to be useful for summer.


     I chopped the sleeves off.


     For the green one I ruched the sleeves and then hemmed them.


     I just sewed one line of elastic thread around the edges of the pink one.


     Then I trimmed off a few inches off the bottom of the shirt and sewed on a circle skirt. Made has an excellent tutorial for circle skirts if you need help with that. They are just perfect for little girls who love to run and twirl.


      Add a tie around the waist and its all done! I didn't sew the ties on these ones, but that may change if the little lady can't keep them on.


Linking to:

Thursday, March 24, 2011

Summer wraps - tutorial


     A week or two ago when I made these cardigans, a couple of you asked for a tutorial. All I need is an excuse to sew something so here it is. I made these sleeveless, but sleeves can easily be added using these instructions. I used lightweight knit material for both of these. Use stretch lace for the lace cut out if you wish to do that one. I'm going to use mostly sketches to explain this one, because I didn't feel like the pictures made a whole lot of sense.
     First I'm going to show you how to make this one.


     Start out by tracing a shirt or tank and cut out.


     Take one piece of your cut out and cut it in half. These will be your front pieces.


     Round out the corners of your neckline.

     Now cut out the following pieces. Two "scarf" pieces for either side of the front and one neck piece for the top of the back. (I am calling them "scarf pieces" because they look like a long scarf sewn to the edges of the wrap) You can angle your "scarf" pieces down, up or leave them straight. I chose to do mine angled up, but I've seen them the other ways as well.

     Sew your shoulder seams and side seams. (note: if you are adding sleeves do so now) Sew one long "scarf" piece to the neck piece and then to the other long "scarf" piece.  This will look like a long strip of fabric.
     Sew this piece to your wrap making sure your angled pieces are facing the way you want them. Try to line up the two seams with the shoulder seams. At this point you can be done or you can finish the edges some how. I chose to lettuce edge mine.


     To lettuce edge, sew a zigzag stitch set to the widest it will go along the edges. Stretch out the material as you sew. It will curl the edges. It works the best if your material has a four way stretch. Mine had only a two way stretch so some of the edge are slightly more curly than other parts.
     All done!


     The lace cut out one is very similar. Cut out your shirt pieces as above minus the "scarf" portion. On your back piece cut out whatever size portion you want to be lace. Use that as your pattern to cut out the lace.
      Sew the lace into the shirt and top stitch around it. I used my serger to sew the lace in, but if you don't have one just use a zigzag stitch.


      Sew a piece of binding across the top of the lace portion. This is how to make binding.

     The binding will look like this.


     Now sew the shoulder seams and the side seams. I didn't do anything to the edges on this one.    


     The same general method can result in a hundred different looks based on how much variety you add to sleeves, neck, edges and so on.
Happy Sewing!

Linking to:
The Freckled Laundry

Tuesday, March 22, 2011

Quick little before and after

     Yesterday, I was telling you about a few of my finds from my "junking" adventure Saturday. One of my discoveries was this rather sad looking little stool. It cost me a whopping $5.


     I brought it home to use as a sewing stool. I already have one, but it is a pain to shuffle a chair back and forth from the sewing machine to the serger. (if you saw the tight little area my sewing stuff is in you would understand...I'm not about to show you a picture either...its a catastrophic mess!) I normally stand while I use my serger, but that usually just results in a nice back ache. Some red paint and bright colored fabric makes this as happy looking a little sewing stool as anyone could wish to have.


     I plan on fixing up my little sewing nook and organizing it all. I figure, since it isn't attached to the house, I will use some fun, bright colors. It doesn't need to look as serious as a living space after all.


     All in all, I think it was $5 well spent!