Thursday, March 28, 2013

Happy Easter!

He IS Risen free Easter Printable. aka design. #printable #Easter #chalkboard

     Spring, Easter, life...all things that shout to us just how much we are loved by God in Heaven. I hope you'll take a moment to reflect on just how much God loved and sacrificed for us this special weekend...as fun as pretty eggs and chocolate are, they don't much compare to the special gift God himself gave us.  I wish you and your family a very happy Easter weekend!

 1 Peter 3:18   For Christ also hath once suffered for sins, the just for the unjust, that he might bring us to God, being put to death in the flesh, but quickened by the Spirit: 
Pin It

Tuesday, March 26, 2013

Your order has been shipped...my "mail cart"


      I have a short attention span when it comes to projects. Like, reeeeaally short. Which is why I must have thought it would be a good idea to get a whole entire house that needed redoing....because I can get that done in a day of course. As you know from my last post, we're making pretty good headway in the kitchen. Although, every other day or so, I've got to come up for air and do something different, or I'll go batty. To keep from getting bogged down,  I've been bouncing back and forth between my work shop and the kitchen.


     So, let me introduce you to the "mail cart". I love my Etsy shop. I'd spend all day doing nothing but sewing up things for it if I thought I could get away with it. One of the funnest parts of selling online, is getting to send my stuff all over the world. I love packaging up orders and daydreaming about where they are going.


     Here on this little cart/shelf, is everything I need to print out shipping labels, wrap orders, tag them with a business card and a thank you card, and get them out the door.


     Castors on the base make it easy to push around if I get a hankering to rearrange. (Which most certainly will happen, given enough time.)


    Random baskets, jars, crate, and an old chicken feeder help organize envelopes, labels, printer paper, pens, scissors, twine, and every other such thing I need to ship an order...and keeps me enormously happy, because it doesn't feel too stiff and office-y. 


     A painted thrift store frame and a bit of twine make a handy pin board to top it all off.


     Nobody said work had to be boring after all!

Psalms 91:4   He shall cover thee with his feathers, and under his wings shalt thou trust: his truth shall be thy shield and buckler.

Thursday, March 21, 2013

DIY Kitchen Countertops


          Every now and then, you come across things (or whole rooms) in your house that just need a little sprucing up...you know, they just are lacking something. Sometimes you can't just put your finger on what that might be...


     ...and sometimes...you can figure it out pretty easily.


       If you read this post about my unfortunate pink kitchen, you know I had big plans for this unsightly room of mine. "Big plans" equals "big work", and in most cases, "big spending" as well. Work, I can handle, the money part on the other hand...well, we might just have to consider that one a bit. I decided to shop our options for counter tops. We needed something cost efficient and durable. 
       One thing we knew for sure, labor is the major cost of any home improvement, so we wanted to the work ourselves...even though we did not have a clue what we were doing!


         Obviously, the first thing we had to do, what get rid of few things.


       Then, using liquid nail and screws, we attached a new counter top using pine panels found in the lumber section at Lowes. You can buy these in different lengths and widths. We used 24 inch wide and 1 inch thick pieces.

 1-in x 24-in x 36-in Stain Kiln-Dried Kiln-Dried Elliotis Pine Panel
    My mister cut them to fit together around the corners and used a jig saw to cut out a spot for the sink. He screwed them on from underneath. I very dumbly deleted all of the pictures I took of this entire process, but it's pretty self explanatory. Glue, set the boards in place, and then screw. I pretty much think he did an amazing job getting everything to fit just right.


      At that point, I took over, and used an electric sander to even out all the cracks and make it baby smooth. The sink really should have been put in last, but we didn't figure that out until right about this point. Oh well. After sanding it down, I stained it with black stain.


      At this point, I was starting to wonder if this had been such a good idea after all. We were too far in to quit now, so next up was the varnish. I used a heavy duty Polyurethane and a sponge brush to apply it.


     I gave it six coats, lightly sanding between each coat. It looked immensely better with some shine!


    To be honest though, I still wasn't 100% sure I was on board with it though. It was all just so dark looking still, that I couldn't really tell if they were good or not. A little white paint to let the sunshine pour into that dingy old dark kitchen did the trick. They get my vote now, for sure and for certain!


      Sometimes, looking at what things cost can be quite disheartening ..but maybe, you're just looking in the wrong department? There's no law that says kitchen counters have to be ordered from the kitchen department. They actually might be hiding out in the lumber isle...or the roofing section, or on the cement shelf, or you name it!


       You can make just about anything work, if you are willing to give it a try...even if you've never done it before! What can it hurt? Most likely, even an imperfect job will be worlds better than what you started with!


    Things don't happen over night, but as with anything, persistence will pay off! And now that I've delivered this inspiring pep talk, I'm off to paint cabinet doors...which anyone within a 50 mile radius has probably heard me griping about in the last week! I don't see why we need cabinet doors anyway...
Have a great weekend!

Hebrews 11:1   Now faith is the substance of things hoped for, the evidence of things not seen.

Thursday, March 14, 2013

Industrial Style Desk Makeover


       We've been having some really lovely sunny days lately. Definitely not the sort of days I want to spend holed up inside slaving over some boring wall that needs painting. On a nice warm sunny day, the thing to do is dress your kids in grungy clothes and let them go stomp in the mud puddles to their little heart's content, while you pull out some random piece of junky furniture to fix up.


      I found this beauty at a thrift store and immediately liked the sort of old school industrial vibe it had. The top was particle board and the seat was some ratty vinyl stuff, so that all needed to come off. I freshened up all the metal with some spray paint.


      I needed a new seat for the chair, and decided to make my own with some scrap wood.


       Only one problem, I had no foam for the seat. Well, good thing I'm not picky about these sorts of things! An unused throw pillow did the trick for me just nicely.


      Using some fabric I found in my stash, I stapled it all directly to the back of the wood.


       It made just the nicest little seat you ever saw!


     There was one other problem with this little arrangement that I needed to do something about. The desk was just a smidgen too short for my rather tall self. I scrounged around amongst my treasures and found some wheels I had saved off of some discarded piece of something who knows how long ago. It really does pay off to save things you might be able to reuse! The wheels added just the needed amount of height. Wheels make anything niftier anyway.


       Luckily, I had some wood left over from making our counter tops (Which I am dying to show you, because I looooooooove them!) that was just the perfect size for the desk top.


      A coat of stain and two of poly later...one super cute desk!


       Totally more fun than painting walls, wouldn't you agree?


         This little desk is currently operating as my sewing table, and is pushed up against my horrifically ugly unpainted cinder block wall. Which pretty much is a daily reminder that I need to paint the thing, and fix the floor, and....ok, anyway, back to my cute desk...


      In other news, I'm in the midst of painting my kitchen...and if the tedious time consuming-ness of it doesn't kill me first, I'll be giving you the grand tour soon! I love what paint can do for a room! It sorta shocks my eyeballs when I walk in there, and I'm still at the priming stage! Love it!
P.S. I'm having a Spring sale in my shop, all bags 50% off!

Luke 6:35   But love ye your enemies, and do good, and lend, hoping for nothing again; and your reward shall be great, and ye shall be the children of the Highest: for he is kind unto the unthankful and to the evil.

Tuesday, March 12, 2013

A scrappy wall storage unit - My first building project


      Power tools and I have never been friends. Not too long ago, I instructed my mister to pick up a pack of screw drivers at the hardware store...and he came home with a new drill instead. I was not happy. I don't like drills. I wanted a screwdriver.


     Very reluctantly, my drill and I became friends. I have my inpatients to thank for becoming friends with power saws. I have way too many projects I want to get done to sit around waiting for my mister to have time to cut wood for me. What's a girl to do, but suck it up and learn how to cut wood?


      Originally, I planned to make wall storage along these lines for this wall. (You can read more about my cinder block wall here.)

#DIY Industrial Rustic Shelf Tutorial.

      Turns out, shelves like that, the size I wanted, was not exactly cheap. Have you looked at the price of pipe lately? Maybe I'm missing some important part of pipe shopping, but it's rather pricey. I needed something more along the general price range of free to properly fit my budget.
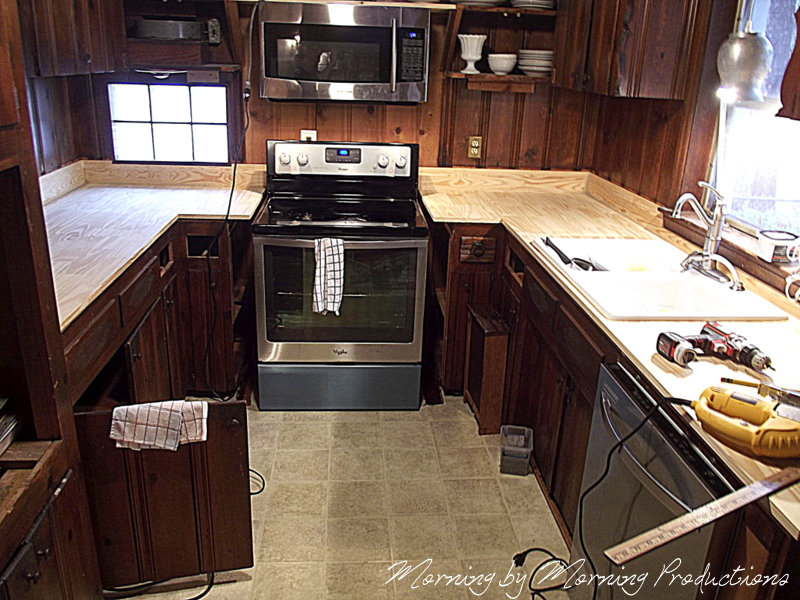
     Plan B involved scrounging around and using anything I had on hand that could possible be turned into a shelf. I started with these two doors that I pulled out of my kitchen a few weeks back.


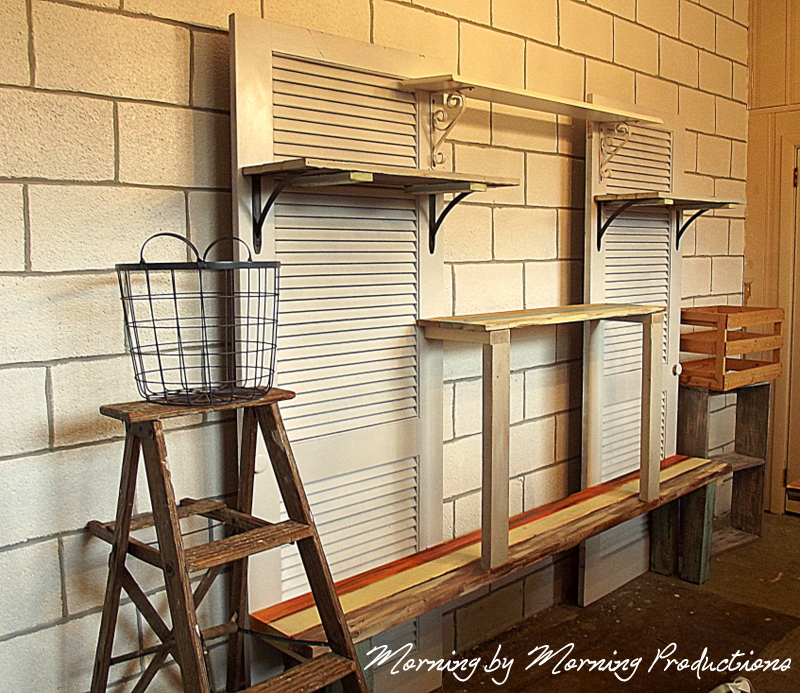
      I cleaned them up, and primed and painted them.


      Next up I made a long shelf using some 2x4's I had left over from another project. I used screws for everything so I can take this thing apart later, if I so desire.


      I cut four legs from a 4x4.


       At this point I dragged everything inside to assemble it all. The four legs I screwed onto the shelf, essentially making a long bench.


     I screwed the doors to the "bench" along the back. (Uh hum, so ya, I maybe skipped painting the back of the doors. Perfection was never my stongest asset.)


      I decided to my doors needed more stability, so I added 2x4 scraps to the front connecting down to the main shelf.


      I made another shelf using scrap board that actually was originally in this room behind the paneling I pulled out.


     Using brackets I had laying around, I added a few more shelves. An old ladder, a former pigeon nesting box, and crate helped round out the storage options.


 I couldn't help myself and added a little color by dry brushing random paint samples on the boards.


       And what will I do with these super cute shelves? Why, use them for storage, naturally.


      I can't stand pawing through totes, smashing everything to bits, looking for the one piece I need. Now, I don't have to!


       I can just "shop" my wall. This room is my work/sewing room, and I can't think of what "art" I'd rather look at while working than loads of random textures and colors.


      Besides, if I ever wanted to have a garage sale...all I'd have to do is open the front door. =) Seriously though, isn't knowing what you have so much nicer than having it all tucked away in some dark corner?


      And before you kindly suggest I might have hording tendencies...let me just remind you, there are only two rooms in my entire house that have been fully furnished. (See the entry here, and the guest bathroom here.) These shelves will clear off quite a bit as each new room is fully finished.


      In the mean time, I have decided wood working isn't so bad after all! It's not much different than sewing really...axcept fabric is more forgiving and doesn't give me a back ache.


        The only thing I specifically purchased for this project was the 4x4...making the total cost for my shelves $6.57. Now that's more like it!

Colossians 3:23   And whatsoever ye do, do it heartily, as to the Lord, and not unto men;